共计 1796 个字符,预计需要花费 5 分钟才能阅读完成。
kubernetes 中怎么部署 dashboard,很多新手对此不是很清楚,为了帮助大家解决这个难题,下面丸趣 TV 小编将为大家详细讲解,有这方面需求的人可以来学习下,希望你能有所收获。
适用场景:linux 系统,kubernetes1.4 及以上,没有配置 CA 等认证。其它情景仅作参考。
dashboard 主要用于查看 k8s 集群的资源状态信息! 也可以用于监控的集成
配置 dashboard 需要两个 yaml 文件 Deployment 和 service,也可以将这两个文件的内容合在一个文件里写,中间用 —– 分开即可。
下面是文件的具体内容:
dashboard-deployment.yaml 文件内容
kind: Deployment
apiVersion: extensions/v1beta1
metadata:
 labels:
 app: kubernetes-dashboard
 version: v1.1.1
 name: kubernetes-dashboard
 namespace: kube-system
spec:
 replicas: 1
 selector:
 matchLabels:
 app: kubernetes-dashboard
 template:
 metadata:
 labels:
 app: kubernetes-dashboard
 spec:
 containers:
 - name: kubernetes-dashboard
 image: registry.cn-hangzhou.aliyuncs.com/sjq-k8s/kube-dashboard-amd64:v1.4.0
 imagePullPolicy: Always
 ports:
 - containerPort: 9090
 protocol: TCP
 args:
 # Uncomment the following line to manually specify Kubernetes API server Host
 # If not specified, Dashboard will attempt to auto discover the API server and connect
 # to it. Uncomment only if the default does not work.
 - --apiserver-host=http://192.168.122.10:8080 ##  请修改为自己的 kebu-apiserver
 livenessProbe:
 httpGet:
 path: /
 port: 9090
 initialDelaySeconds: 30
 timeoutSeconds: 30
防止镜像下载错误,我已将其中的镜像已经换成了我的阿里云镜像,可直接下载
注意一定要将其中的 - –apiserver-host 改成自己 k8s 集群的 apiserver
dashboard-svc.yaml 文件内容
kind: Service
apiVersion: v1
metadata:
 labels:
 app: kubernetes-dashboard
 name: kubernetes-dashboard
 namespace: kube-system
spec:
 type: NodePort
 ports:
 - port: 80
 targetPort: 9090
 selector:
 app: kubernetes-dashboard
依次启动 deployment 和 service
(这里以我 git 上合并的文件为例)
kubectl create -f kube-dashboard.yaml查看是否已经为 running 状态
kubectl get pods -n kube-system运行成功后即可进入页面查看信息验证
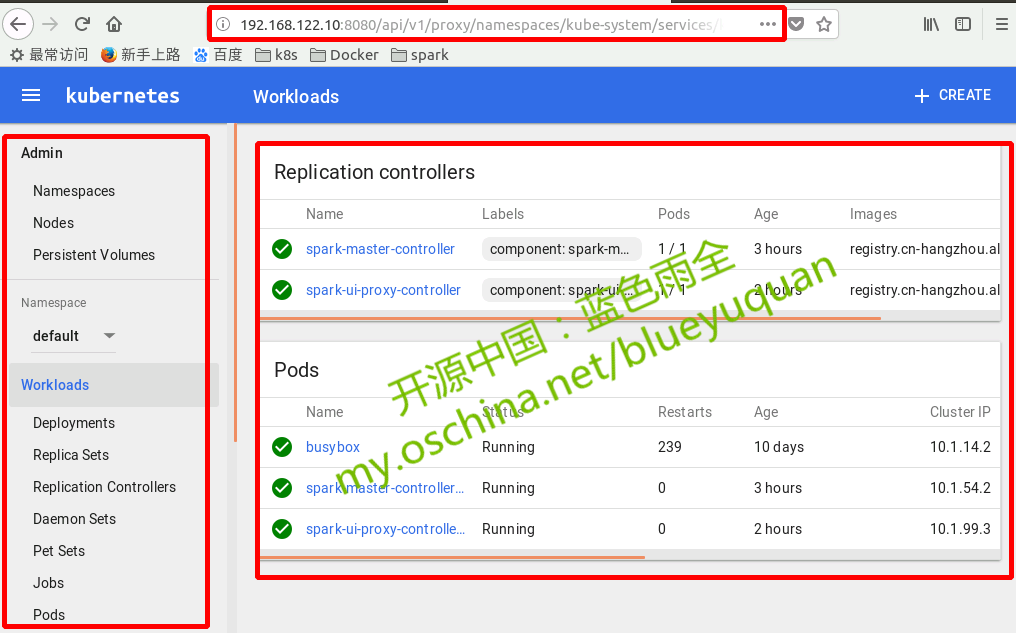
在浏览器中输入 http://localhost:8080/ui/ 会自动跳转到 http://localhost:8080/api/v1/proxy/namespaces/kube-system/services/kube-ui/#/dashboard/  OK!
OK!
实际搭建过程图:


看完上述内容是否对您有帮助呢?如果还想对相关知识有进一步的了解或阅读更多相关文章,请关注丸趣 TV 行业资讯频道,感谢您对丸趣 TV 的支持。

