共计 2760 个字符,预计需要花费 7 分钟才能阅读完成。
自动写代码机器人,免费开通
针对 openstack 环境的搭建,大致涉及如下内容
安全
主要包括各项服务使用的密码,这里为了防止密码混乱,我建议使用同一个密码(生产环境中,不建议这么操作)
主机网络配置如下图,仅供参考学习
 时间同步设置
针对 controller 控制器,时间同步默认使用外网的时间同步器
1)安装时间同步软件包,执行命令如下:

2) 编辑 /etc/chrony.conf, 修改如下: 
3) 在 /etc/chrony.conf 文件添加如下字段,允许 10.0.00/24 网段主机与 controller 进行时间同步

4)设置时间同步开机自启动

针对其他所有节点
1)安装时间同步软件包

2)编辑 /etc/chrony.conf, 时间同步需要使用 controller 节点时间同步器

3)设置时间同步开机自启动

openstack 软件包(安装在所有节点)
环境中使用 centos7.2 最小安装,系统默认使用 LVM,同时禁用 SELINUX、禁用 firewalld 以及 iptables、在 centos 系统的各个节点,均执行如下操作:

安装升级包,建议完成安装后,重启系统

安装 openstack client 软件包

安装 openstack SELINUX,该软件包将会接替系统自身的 SELINUX,当然我为了安全起见,我是默认禁用了所有主机的 SELINUX

在 controller 节点主机上面安装 SQL 数据库,并进行配置
1)安装相关软件包,执行命令如下:

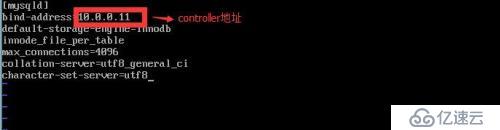
2)在 /etc/my.cnf.d/ 下创建 openstack.cnf, 具体内容如下:
3)设置开机自启动,并启动数据库服务

4)数据库初始化,在命令行输入如下

初始化过程命令输出如下:
NOTE: RUNNING ALL PARTS OF THIS SCRIPT IS RECOMMENDED FOR ALL MySQL
SERVERS IN PRODUCTION USE! PLEASE READ EACH STEP CAREFULLY!
In order to log into MySQL to secure it, we’ll need the current
password for the root user. If you’ve just installed MySQL, and
you haven’t set the root password yet, the password will be blank,
so you should just press enter here.
Enter current password for root (enter for none): (第一次输入为回车,因为没有密码)
OK, successfully used password, moving on…
Setting the root password ensures that nobody can log into the MySQL
root user without the proper authorisation.
Set root password? [Y/n] y(第二次输入为 y,然后设置数据库密码)
New password:
Re-enter new password:
Password updated successfully!
Reloading privilege tables..
… Success!
By default, a MySQL installation has an anonymous user, allowing anyone
to log into MySQL without having to have a user account created for
them. This is intended only for testing, and to make the installation
go a bit smoother. You should remove them before moving into a
production environment.
Remove anonymous users? [Y/n] y(第三次输入为 y)
… Success!
Normally, root should only be allowed to connect from ‘localhost’. This
ensures that someone cannot guess at the root password from the network.
Disallow root login remotely? [Y/n] n(第四次输入为 n)
… skipping.
By default, MySQL comes with a database named ‘test’ that anyone can
access. This is also intended only for testing, and should be removed
before moving into a production environment.
Remove test database and access to it? [Y/n] y(第五次输入为 y)
– Dropping test database…
… Success!
– Removing privileges on test database…
… Success!
Reloading the privilege tables will ensure that all changes made so far
will take effect immediately.
Reload privilege tables now? [Y/n] y(第六次输入为 y)
… Success!
Cleaning up…
安装 NoSQL 数据库(仅在 controller 节点操作)
1)安装软件包,执行命令如下:

2)编辑 /etc/mongod.conf, 修改 bind_ip 为控制器的管理 IP,即 10.0.0.11,并去掉 smallfiles=true 的前面的注释符号


官方说法如下

在目录 /var/lib/mongodb/ 下默认是不存在 journal 目录的,当我们修改载 /etc/mongod.conf 目录去掉 smallfiles=true 的前面的注释符号后,并启动 mongod 服务

就会在 /var/lib/mongodb/ 下自动生成 journal 目录
消息队列服务(仅在 controller 节点操作)
1)安装软件包

2)将消息队列服务启动并设置为开机自启动

3)添加 openstack 用户

4)为 openstack 用户授予读写权限;

缓存服务(仅在 controller 节点操作)
1)安装软件包

2)启动缓存服务并设置为开机自启动

后面将对各个组件安装配置进行讲述,更多精彩,敬请期待。
参考 http://docs.openstack.org/mitaka/zh_CN/install-guide-rdo/environment.html
向 AI 问一下细节丸趣 TV 网 – 提供最优质的资源集合!


